For you to use data bricks in Azure, it is important or rather the first step to have an account in Azure, and then since data bricks is a service in azure, to have a service for it. In this post, we will see how to create an account in Azure data bricks.
If you search for data bricks services in Azure search bar, and open databricks, and have no services created, this is what the page looks like.

Click on create new data bricks service, and you will find yourself looking at this page –
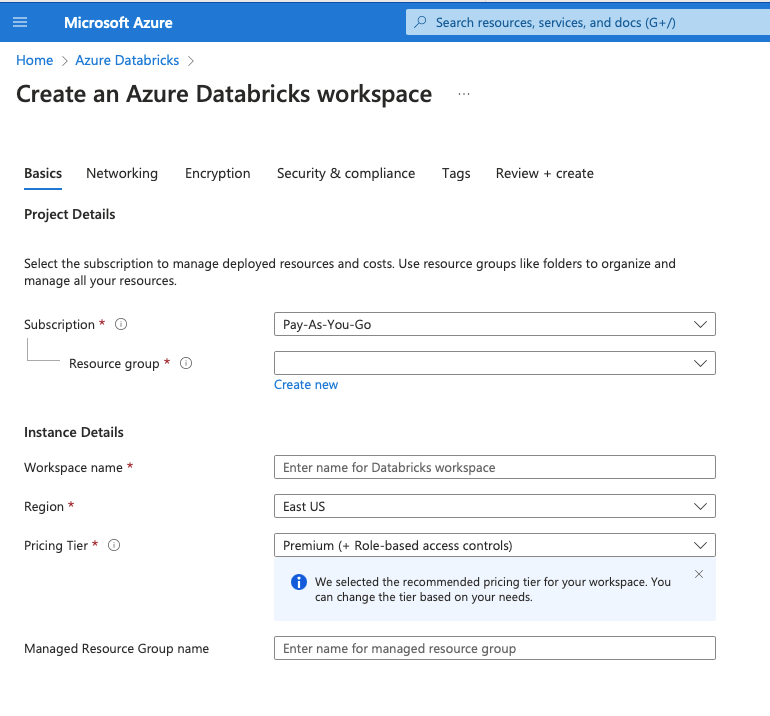
Let us now understand each of these –
- Subscription – Anything that you do in Azure, is part of a Subscription. This is like a container for all the billing. You can control access and resources using this.
- Resource Group – This is a logical container to hold all the related resources together.
- Workspace Name – This is the name of the workspace. So, basically when we create a data bricks service, we are creating a workspace.
- Region – Choose the region where you want to deploy your data bricks. Remember, that the pricing varies for different regions.
- Pricing Tier – There are three pricing tiers –
- Standard
- Premium
- Free
- Managed Resource Group Name – This is the place where the clusters will be created. To ensure that nothing breaks them, they are placed in a separate lock so that you cannot modify them later.
You can check out the different pricing tiers and their details at – Databricks Pricing
Here, let us summarise the differences between standard and premium, or rather list out the things that are missing in standard, that will be available in premium.
- Alerting and Monitoring with Reuse
- Unity Catalog(Cross-Workspace Data Governance
- Unity Catalog (Automated Data Lineage)
- Managed Delta Sharing
- Audit Logs
- Cluster Policies
- Role-Based-Access Control
- Azure AD Credential Passthrough
- Token Management API
- Customer Managed Keys
- IP Access List
- HIPAA Compliance
- Enhanced Security and Compliance
We have detailed out what these mean, and you can figure out whether these add any benefits for you, or sticking to standard plan works.
Once you have completed the basic selection –
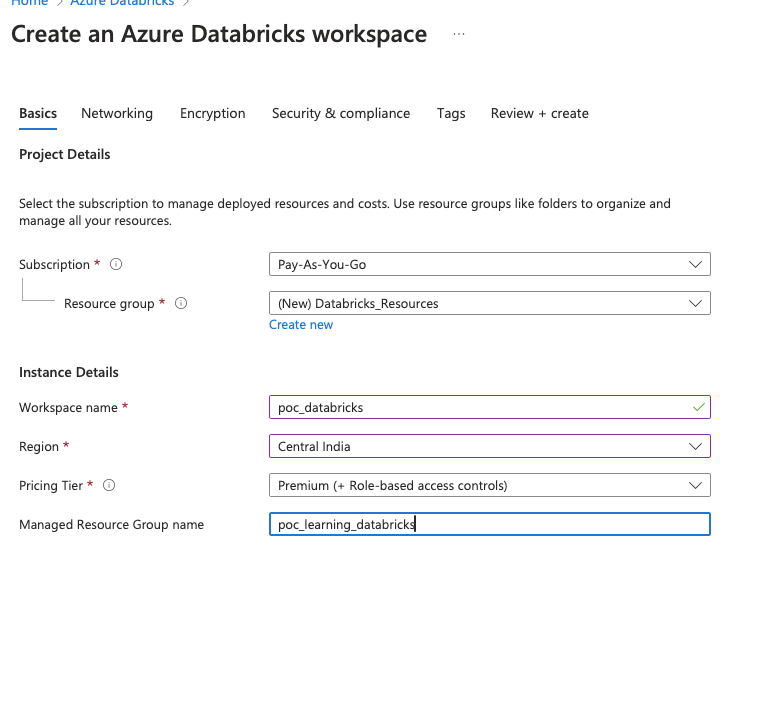
You get a screen similar to this. You can then choose to review+Create or choose to select manually the next settings.
Let us do this manually. So the next setting is Networking. Let us understand both these choices –

- Deploy Azure data bricks workspace with Secure Cluster Connectivity –
- If you set this as No – the cluster nodes will have a public IP address.
- If this is set as Yes – ensures that Databricks cluster nodes in the classic compute plane do not have public IP addresses and that customer virtual networks have no open ports
- Deploy. Azure data bricks workspace in your own Virtual Network – This is when you have a virtual network of your own and you would like to use that.
- If you set this as No – data bricks will deploy the workspace in a managed VNet and you will have less control over network and security configurations.
- If you set this as Yes – you get to have more control
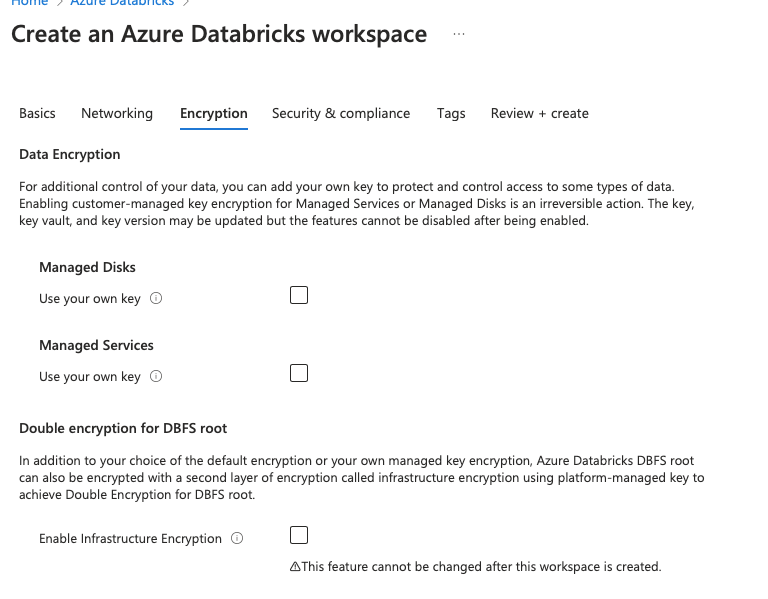
Once we have selected our Network, we choose the Encryption details next.
When choosing encryption, you get the following options –
To understand this, you need to understand that azure data bricks workspace has –
- Control plane manages databricks platform backend services including web application, cluster management and job scheduling.
- Data plane handles data processing and computation like running jobs, notebooks and data bricks SQL.
- DBFS root -This is the default storage location provided for a workspace.
Let us now understand the different options available in this –
- Managed Disks – Azure Databricks compute workloads in the data plane store temporary data on Azure managed disks. By default, data stored on managed disks is encrypted at rest using server-side encryption with Microsoft-managed keys. If you choose this as yes, you get to choose your own key for additional security. Once this is enabled, it cannot be disabled.
- Managed Services – Managed services data in the Azure Databricks control plane is encrypted at rest. After you add a customer-managed key encryption for a workspace, Azure data bricks uses your key to control access to the key that encrypts future write operations to your workspace’s managed services data.
- Double encryption for DBFS root – By default, Azure encrypts storage account data at rest. Infrastructure encryption adds a second layer of encryption to your storage account’s data.
Once you are completed with encryption details, you can choose security and compliance settings. These are options that are available in enhanced security and compliance. The compliance security profile enhancements apply to compute resources in the classic compute plane in all regions.
The compliance security profile enhancements for HIPAA also apply to compute resources in the serverless compute plane in all regions.
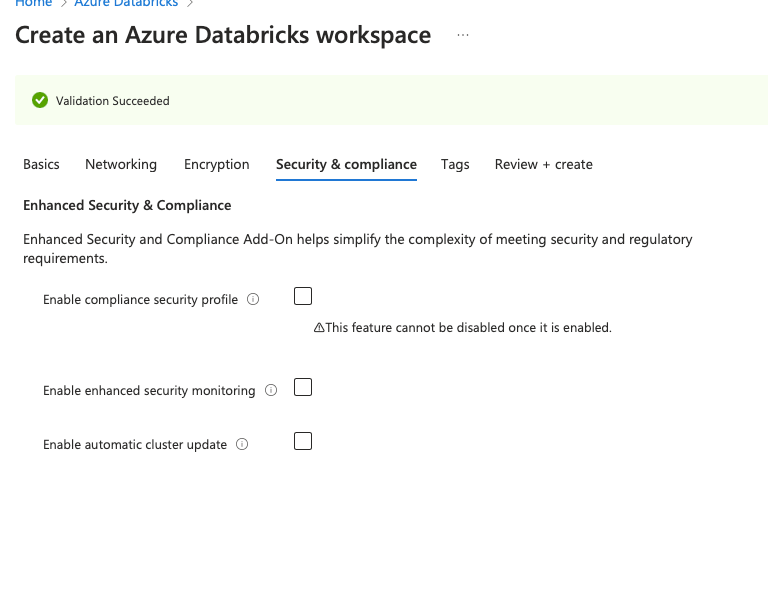
Enable compliance security profile – If you select this, you cannot select the the other two options. There are two compliance options available in this –
- HIPAA – Health Insurance Portability and Accountability Act. This is used to protect the privacy and security of Protected Health Information(PHI).
- PCI-DSS – Payment Card Industry Data Security Standard. This is used to ensure the secure handling, storage and transmission of payment card data.
Depending on the data that you will be storing you can choose, which compliance to go for.
Enable enhanced security monitoring – Azure dtabricks enhanced security monitoring provides an enhanced hardened disk image and additional security monitoring agents that generate log rows that you can review using diagnostic logs. The security enhancements apply only to compute resources in the classic compute plane, such as clusters and non-serverless SQL warehouses.
Serverless compute plane resources, such as serverless SQL warehouses, do not have extra monitoring when enhanced security monitoring is enabled.Refer.
Enable automatic cluster update – Automatic cluster update ensures that all the clusters in a workspace are periodically updated to the latest host OS image and security updates. Account admins can schedule the maintenance window frequency, start date, and start time. Refer.
Find more at – Compliance and Security
You can finally choose tags. These are helpful in data governance.
Once done, click on Review +Create and you can search for your resources.
With this, we conclude for today.
Happy Learning 🙂

Leave a reply to lavanya Cancel reply